If you’ve ever wondered what the camera grid is for, this article is for you.
No doubt you’ve heard of the Rule of Thirds?
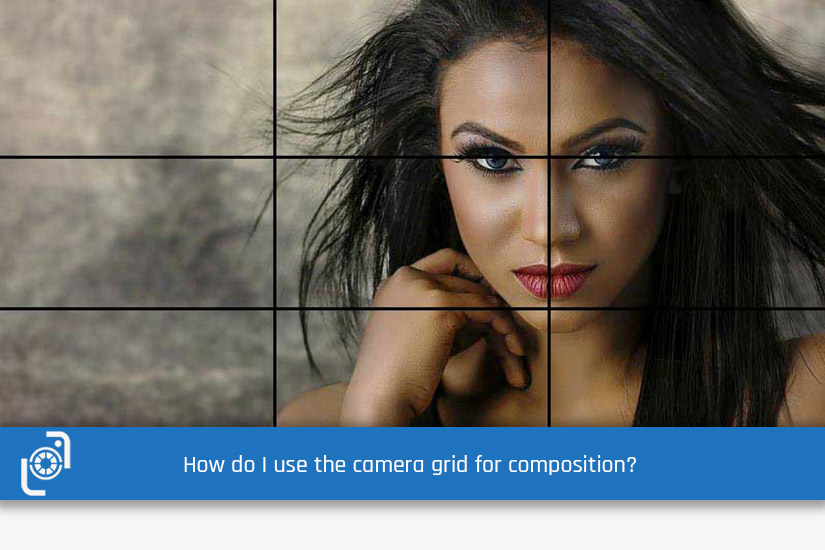
The camera grid is most often used, to help with this fundamental compositional technique.
You can find more about the Rule of Thirds here, but simply put, the grid divides your screen into nine equal sections, forming a 3×3 grid. The rule of thirds suggests placing your main subject along the lines, or at the intersections of these gridlines.
There are loads of other uses, which I’ll get into in a minute, but for now here’s how you turn it on:
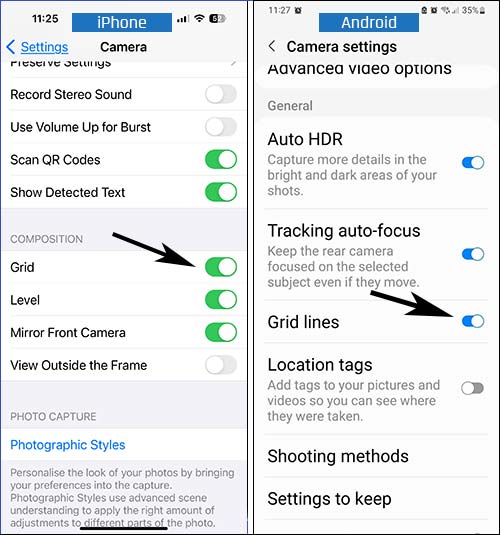
Enable the Grid: Open your smartphone camera settings and look for an option to enable the grid. On most devices, it can be found under the camera settings, or composition settings.
So, now you’ve turned on the camera grid, what can you use it for? Here’s some ideas:
Ideas for Using the Camera Grid
Balancing Elements: The grid can also help you to place other key elements of your composition along the gridlines. For example, if you’re photographing a person, you can position their eyes along the upper horizontal line, or if you’re photographing a building, you can align its vertical edge with the vertical gridlines.
Symmetry and Patterns: The grid also aids in achieving symmetry and capturing patterns. You can align symmetrical subjects or elements with the gridlines, to create a harmonious and well-composed image.
Remember, the grid is a tool to assist you in composing your photos. Feel free to experiment with different compositions and adjust based on your creative vision.
Over time, using the grid becomes more intuitive, and you’ll develop an eye for balanced and visually appealing compositions.
So, try turning on your camera grid, then experiment and let me know how you get on 🙂
Until next week, stay sharp!
Steve