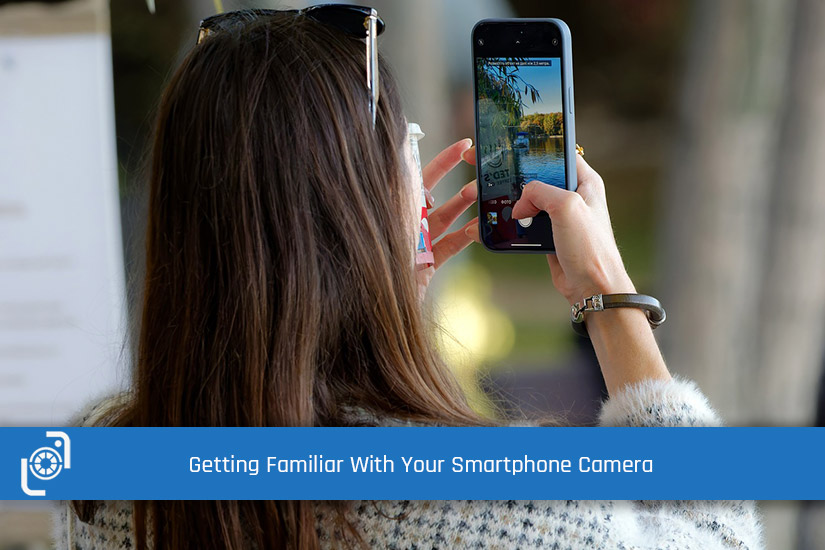
Introduction: Welcome to the world of smartphone photography!
In today’s digital age, our smartphones have become powerful tools that we carry with us all the time. With all their many features, the smartphone camera stands out as a versatile and accessible tool for capturing stunning photographs.
Your smartphone is basically a sophisticated camera, that can also make phone calls!
With a little know-how and creativity, you can unleash the power of your smartphone camera and take your photography skills to new heights. In this article, we’ll explore some of the basics, to help you capture incredible photos with your smartphone.
I’ll breakdown some of the various settings and features of your smartphone camera, helping you capture amazing photos and explore the full potential of your device. Let’s get started!
Basic Smartphone Camera Functions
Before we start getting into the operational parts of the camera, let’s just quickly start at the beginning…
Accessing the Camera App
- iOS: Locate the camera icon on the home screen or swipe left from the lock screen.
- Android: Find the camera app icon in the app drawer or on the home screen.
Switching Between Front and Rear Cameras
- iOS: Look for the camera switch icon (usually two overlapping arrows) and tap it.
- Android: Locate the camera switch icon (usually a camera with curved arrows) and tap it.
Taking a Photo
- Tap the shutter button (usually a circle or camera icon) to capture a photo.
- Experiment with tapping different areas of the screen to focus on specific subjects.
Exploring Camera Settings
Accessing General Settings
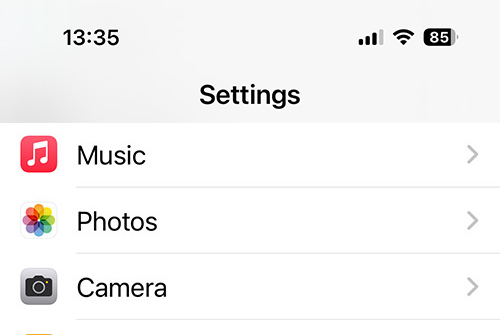
It doesn’t matter whether you’re using an iPhone, or an Android, there will be various options you can adjust in the camera setting panel. Here’s how to get there and what you’ll find…
- iOS: Go to the main settings app, scroll down, and find the Camera option.
- Android: Open the camera app and locate the settings icon (usually represented by three dots or lines) and tap it.
Resolution and Aspect Ratio
The resolution and aspect ratio settings determine the quality and dimensions of your photos. Let’s explore the different options and when they are most often used:
Resolution Options:
- High Resolution (e.g., 12MP, 16MP, or higher): Choose high-resolution settings when you want to capture photos with maximum detail and clarity. This option is ideal for printing large-sized images or when you anticipate the need for extensive cropping or editing.
- Medium Resolution (e.g., 8MP, 6MP): Medium-resolution settings strike a balance between image quality and file size. They are suitable for everyday photography, social media sharing, and general use where high levels of detail may not be critical.
- Low Resolution (e.g., 2MP, 1MP): Select low-resolution settings when you want to conserve storage space or when you intend to share photos primarily through messaging apps or email. However, keep in mind that lower resolutions may result in a loss of detail and image quality.
Aspect Ratio Options:
- 4:3: The 4:3 aspect ratio is the standard option and closely resembles the traditional shape of photographs. It provides a balanced composition and is well-suited for capturing a wide range of subjects, including landscapes, portraits, and general photography.
- 16:9: The 16:9 aspect ratio is wider and more panoramic, making it ideal for capturing expansive scenes, landscapes, or when you want to emphasize a wide field of view. It can also be useful for video recording or if you plan to display your photos on widescreen monitors or TVs.
- 1:1 (Square): The square aspect ratio is particularly popular for social media platforms like Instagram. It offers a unique composition style and works well for symmetrical subjects or when you want to experiment with creative framing.
Considerations:
- Higher resolutions result in larger file sizes, which can consume more storage space on your device. Make sure you have enough storage capacity or consider using cloud storage options to accommodate larger file sizes.
- When choosing an aspect ratio, consider the final output or platform where you intend to share your photos. Different social media platforms and printing services may have specific requirements or preferred aspect ratios.
Remember, you can always experiment with different resolution and aspect ratio settings to see which ones best suit your photography style and specific shooting conditions. It’s a great way to explore the creative possibilities of your smartphone camera and achieve the desired outcome for your photos.
HDR (High Dynamic Range)
- HDR helps capture a wider range of light and shadow in a single photo, resulting in more balanced exposure.
- Enable or disable HDR in the camera settings based on the lighting conditions and desired effect.
Advanced Camera Features
Depending on your particular smartphone, you might have access to some, or maybe even all of the more advanced features listed in the next two sections.
If not, and you’d like to have them, there are many different apps available to help. There’s a list of some great manual camera apps for Android here and for iPhone here.
I’ve listed the three most often used manual adjustments below. Experiment with the settings and see what you like.
Exposure Compensation
- iOS: Tap the screen to focus on a specific area, then swipe up or down to adjust the exposure.
- Android: Locate and tap the exposure compensation icon (usually represented by a +/- symbol) and adjust accordingly.
Manual Focus
- Some smartphone cameras allow manual focus adjustment for precise control over focusing on specific subjects.
- Look for the manual focus option in the camera settings and experiment with adjusting the focus manually.
White Balance
- White balance helps ensure accurate colours in different lighting conditions.
- Access the white balance settings and choose presets like Auto, Daylight, Cloudy, or experiment with custom settings.
Filters and Effects
- Explore the built-in filters and effects to add creative touches to your photos.
- Access the filters/effects menu in the camera app and preview different options before capturing the photo.
Panorama Mode
- Capture wide-angle panoramic shots by selecting the panorama mode in the camera settings.
- Follow the on-screen instructions to capture the panoramic photo.
Portrait Mode
- Some smartphones offer a portrait mode that creates a shallow depth-of-field effect, blurring the background.
- Find the portrait mode option either in the camera settings, or in your smartphones camera app and experiment with capturing stunning portraits.
Conclusion
Congratulations! You’ve completed the first step on your photography journey and learned how to access and utilise various settings and features of your smartphone camera.
Nothing will improve your photographic skill more than just taking lots of photographs. So, keep practicing, exploring, and experimenting with different techniques to enhance your photography skills.
Enjoy capturing beautiful moments with your smartphone camera and if you’ve got any specific questions, drop them in the comments below 😀
Remember to keep practicing… and stay sharp!
Steve
Featured image courtesy of Surprising Shots